Introduction:
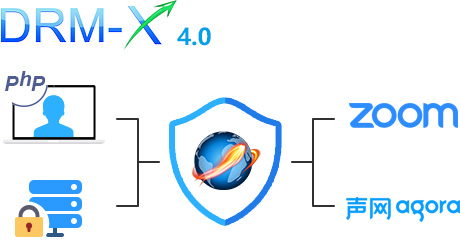
Haihaisoft developed Nginx For Xvast, it's based-on Nginx in Linux Platform. Nginx [engine x] is an HTTP and reverse proxy server. Nginx For Xvast includes all the existing features of Nginx web server, it also supports encrypting dynamic or static website, such as HTML, PHP website. It is also a Reverse Proxy Server, you can Reverse Proxy for any website, and apply DRM-X 4.0 encryption for PHP, JSP, ASP.net, NodeJS websites. The protected website supports all the DRM-X 4.0 security features, such as Smart Prevent Screen, Blacklist, License combined with hardware, and all the source code is encrypted and protected with License. By default, it support protects website with SSL/TLS certificate.

Requirements for Content Provider:
It requires you have a DRM-X 4.0 Enterprise account. For Company, you can apply DRM-X 4.0 Enterprise account for free in the first month. DRM-X 4.0 Fees and Functions Comparison table
You need to have a Linux Cloud Server or Dedicated Server to host Nginx for Xvast. We recommend CentOS. You can also use Ubuntu or any other Linux server.
Requirements for End User:
Install the latest Xvast browser, It supports Windows, MacOS and Android.
Installation:
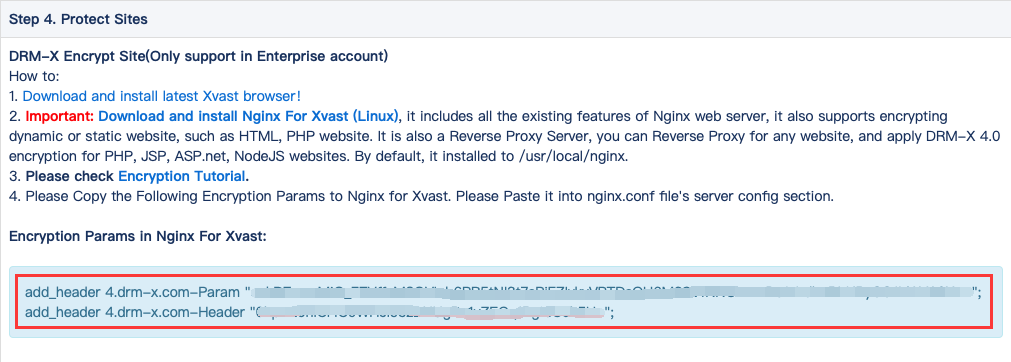
Please visit your DRM-X 4.0 Protect Sites Page, and check Step 4. Protect Sites. Download Nginx For Xvast.
Extract it to your server's /usr/local/nginx/ folder. Here we tested it works in CentOS and Ubuntu Linux. It should also work in other Linux or FreeBSD server.
Get Encryption Params:
Please copy the following Encryption Params to Nginx for Xvast. Please Paste it into nginx.conf file's server config section.

Encryption Params in Nginx For Xvast:
add_header 4.drm-x.com-Param "*****Sample_ReplaceWithYourOwnParam*****==";
add_header 4.drm-x.com-Header "*****Sample_ReplaceWithYourOwnHeader*****==";
Please choose a License Profile, and copy your own Encryption Params.
Configure nginx.conf file. You can use our sample nginx.conf.
As our sample nginx.conf file, you need to make sure:
#gzip on; #You must comment out gzip, and disable gzip to support encryption
Under Server section:
chunked_transfer_encoding off; # You need to make sure: chunked_transfer_encoding off;
Sample Reverse Proxy for website, such as for Reverse Proxy: https://cn.haihaisoft.com:
server {
listen 443 ssl http2;
server_name demo12cn.hhsview.com;
add_header Strict-Transport-Security "max-age=63072000; includeSubdomains; preload";
add_header 4.drm-x.cn-Param "*************************************";
add_header 4.drm-x.cn-Header "************************************";
ssl_certificate /root/.acme.sh/demo1cn.hhsview.com_ecc/fullchain.cer;
ssl_certificate_key /root/.acme.sh/demo1cn.hhsview.com_ecc/demo1cn.hhsview.com.key;
chunked_transfer_encoding off;
location / {
proxy_pass https://cn.haihaisoft.com/;
proxy_ssl_server_name on;
proxy_set_header Accept-Encoding "";
root html;
index index.html index.htm;
}
}
For Host PHP site, here is our Demo PHP WordPress Site: https://demo11cn.hhsview.com
It's running with PHP72, and installed with MySQL.
server {
listen 443 ssl http2;
server_name demo12cn.hhsview.com;
add_header Strict-Transport-Security "max-age=63072000; includeSubdomains; preload";
add_header 4.drm-x.cn-Param "*************************************";
add_header 4.drm-x.cn-Header "************************************";
ssl_certificate /root/.acme.sh/demo12cn.hhsview.com_ecc/demo12cn.hhsview.com.cer;
ssl_certificate_key /root/.acme.sh/demo12cn.hhsview.com_ecc/demo12cn.hhsview.com.key;
chunked_transfer_encoding off;
location / {
root html;
index index.html index.htm index.php;
}
location ~ \.php$ {
root html;
fastcgi_pass 127.0.0.1:9000;
fastcgi_index index.php;
fastcgi_param SCRIPT_FILENAME $document_root$fastcgi_script_name;
include fastcgi_params;
}
}
Get a free SSL certificate in Linux:
yum install socat nohup
curl  https://get.acme.sh | sh
acme.sh --issue --standalone -d demo1.hhsview.com --keylength ec-256
Running Nginx For Xvast:
After you configure nginx.conf and save it, if you are root user, you can start Nginx with this command:
./nginx
If you want to stop Nginx:
./nginx -s quit
After you change the nginx.conf, you need to restart nginx.
After Nginx running successfully, then you can test and visit the protected site's URL in Xvast browser. If you need any help, please feel free to contact us.


